Whether you bought a new PC laptop or desktop for yourself or received one as a gift, there are a few things you need to do before you sit down for your first session of web surfing, productivity or gaming. When you power up for the first time, you’ll probably encounter Windows 11’s OOBE (out of the box experience), which will ask you for your Microsoft login, network ID and some other details. And once you’ve gotten through that, you need to take a few actions to optimize your PC experience.
There are several default Windows settings that slow you down and limit your productivity. For example, the architects of Windows 11 decided to limit the number of options in the right-click menu by default, often forcing you to click an extra time to see the one you want. And, if you didn’t build this PC yourself, both the manufacturer and Microsoft have thrown on some very unwelcome crapware for good measure.
I’ve been setting up and building new PCs since Home Alone 2 came out and testing laptops professionally since Rhianna’s “Umbrella” song was new on the radio. These are the steps I take when turning on a brand new Windows computer for the first time.
Uninstall the Crapware, Starting with Third-Party Antivirus
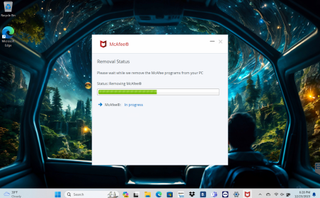
You bought a computer to open websites and run your favorite applications, but wait . . . there’s more! You’ll find some “free gifts” in the Start menu like antivirus software, free-to-play games and apps for popular services such as Spotify or Netflix. This unasked-for preloaded software is a gift in the same way that a child’s full diaper is. And just like the diaper, they need to be thrown out and the remnants wiped away.
The worst piece of crapware — and not every PC comes with it — is third-party antivirus software. Windows 11 has Microsoft’s antivirus built into it for free and it’s pretty good at its job, getting a near-perfect score from the independent labs at AV-Test.
The third-party antivirus your PC comes with inevitably has a 30- or 60-day free trial, after which it will nag you to pay for it. Even within the trial period, the third-party software may install unwanted browser extensions, show pop-ups with annoying promotions and slow your PC down. Uninstall with extreme prejudice.
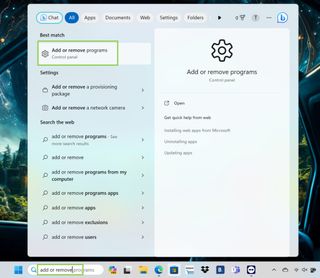
To uninstall all the crapware on your PC, type “add or remove” into the search box and click the top result to go to the Windows setting’s Apps menu.
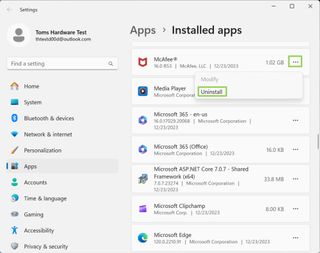
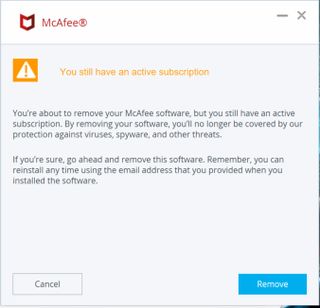
Then, for each unwanted app, click the three-dot menu, select uninstall and confirm your choice when prompted.
Various apps, especially the antivirus software, will try to guilt you into not uninstalling them. Don’t fall for it.
Repeat this process for every piece of crapware.
Download and Install All Updates
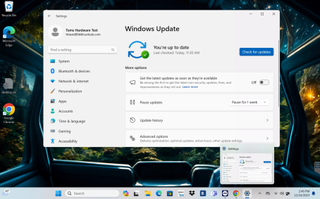
Even if you just installed Windows or your PC came fresh from the factory, there’s a very good chance that there are some updates it needs. During the out-of-box experience Windows 11 downloaded some of them, but usually not all.
Some of these updates may ask you to reboot your computer. Rather than wait for Windows to nag you about restarting, get the updates out of the way proactively.
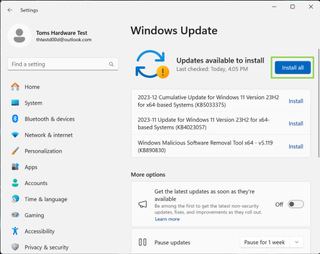
To get to the updates menu, type “update” into the search box, click the top result (“check for updates”). Then either click “Install all” if there are updates waiting or “check for updates” if there are not.
Then wait patiently while they download / install and restart the PC if prompted.
Force Windows to Shutdown / Restart Without Hassle
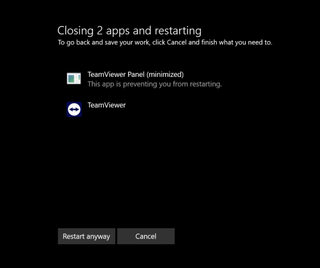
This is one of my least favorite default Windows settings. By default, Windows won’t shut down or restart if it senses that certain apps are still running. These could be actual programs you didn’t close or it could be something in the background.
So, imagine the situation. Your computer wants to do a massive update so you select Restart from the Start menu and get up to grab a coffee while the PC goes through what could be a long process. However, when you come back to your desk, you see an error message like the one above.
Your computer was supposed to restart, but because you weren’t there to press an extra button, which doesn’t appear right away, now you have to sit there and wait while it updates. If you were shutting down a PC to save electricity or battery power, it was still running this whole time.
Fortunately, there’s a relatively simple fix for this problem. To do so:
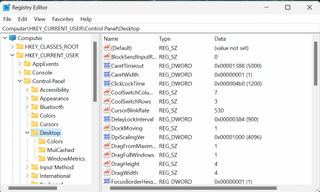
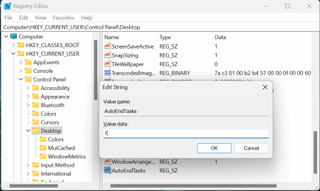
1. Open the registry editor by search for “regedit” and clicking the top result.
2. Go to HKEY_CURRENT_USER\Control Panel\Desktop.
3. Create a String value named AutoEndTasks and set it to 1. You can create string values by right clicking in the right pane of Regedit and selecting New->String Value.
Leave the registry editor open for the next fix.
Enable Full Context Menus
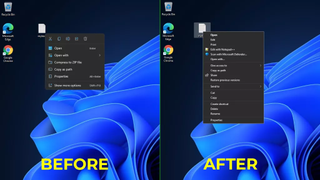
The most annoying unimprovement Microsoft made in Windows 11 is the truncated context menu you get when right clicking on anything. In Windows 10 and prior, you could see all of your options right away, but in the latest OS, it shows you just a few choices and then makes you click the “Show more options” link to see them all. That’s an unnecessary extra click that you may end up making quite a lot.
Fortunately, there’s a registry hack that gives you back the full context menu.
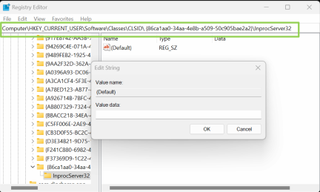
1. Open the registry editor and navigate to HKEY_CURRENT_USER\SOFTWARE\CLASSES\CLSID\
2. Create a new registry key called 86ca1aa0-34aa-4e8b-a509-50c905bae2a2.
3. Add a new registry key called InprocServer32 under that.
4. Open the (Default) key in InprocServer32 and set its value to blank. As always, with registry key changes, you’ll want to restart the computer to see the changes.
Get Rid of the Useless Lock Screen
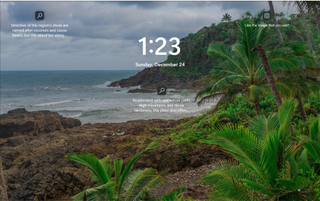
When your computer is locked (or first boots), by default, Windows 11 shows you a lock screen with the time, a wallpaper and maybe (if you allow) some notifications. If you use Windows Hello facial or fingerprint recognition, you can log in by staring at the screen or putting one of your digits on the scanner. But, if you use a password or PIN, you have to click once to dismiss the lock screen before the OS will allow you to enter your credentials.
That’s one extra, unnecessary click every single time you want to unlock your PC. To get rid of the annoying lock screen and save your tired fingers Do this to get rid of it and skip straight to the password / PIN box.
1. Open the registry editor
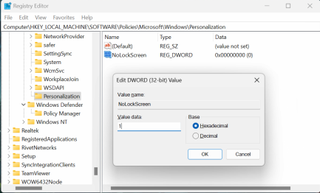
2. Navigate to HKEY_LOCAL_Machine\SOFTWARE\Policies\Microsoft\Windows
3. Create a new key called Personalization if it doesn’t already exist.
4. Within the Personalization key, create a DWORD (32-bit) value called NoLockScreen and set it to 1.
Remove Web Results from Windows Search
The windows search box, which sits in the middle of the task bar, is one of the operating system’s most essential features. When I want to launch an application, navigate to part of the Settings menu or locate an important data file, I click on the search box and start typing the name of what I’m looking for.
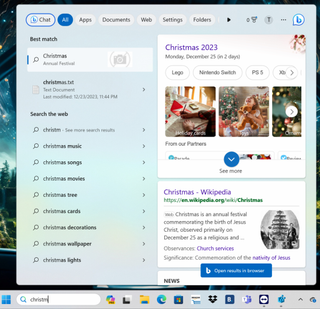
What’s really annoying is that, by default, the search box will also pull results from Bing search and sometimes give you those. For example, I created a text file called christmas.txt and put it in the Documents folder. Then I searched for “Christmas” and a series of web results instead of my file as I started typing “chris” but then eventually got both the web results and my file when I typed more. The behavior was inconsistent as I tried it multiple times.
Every time it hits the web, it’s using bandwidth and slowing me down when all I want from the Windows search box is my local stuff. If I wanted a web search, I’d have gone to Google or Bing directly.
To force Windows to search locally only from the search box:
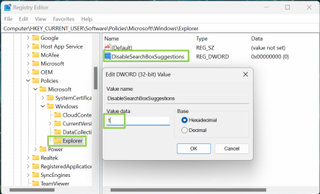
1. Open regedit and navigate to HKEY_CURRENT_USER\Software\Policies\Microsoft\Windows
2. Create a new key called Explorer under that one.
3. In Explorer, create a DWORD (32-bit) value named DisableSearchBoxSuggestions and set it to 1.
Unhide File Extensions and Hidden Files
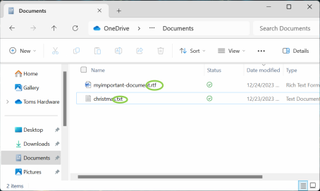
Microsoft thinks that file extensions are too complicated for regular people. So, by default, Windows 11 hides the “.docx” or “.jpg” or or “.txt” or “.exe” suffixes that appear at the end of file names. So when you get a spreadsheet from a friend, File Explorer will show that it’s a “Microsoft Excel Worksheet” whether it’s an Excel 2003 .xls file or a modern-day .xlsx file. Good luck with that!
To make file extensions visible:
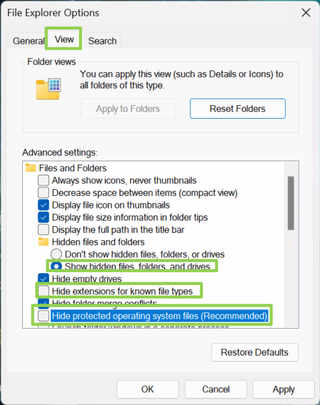
1. Search for “file explorer options” in the Windows search box and click the top result.
2. Select the View tab.
3. Uncheck “Hide Extensions for Known File Types.” While you’re at it, toggle “Show hidden files, folders and drives” to on and uncheck “hide protected operating system files” so you can see all your system files.
Install the Latest Graphics Driver
If your new laptop or desktop has discrete graphics, one of the very first things you should do is make sure you have the very latest driver from Nvidia or AMD. A newer driver usually means better performance in the latest games and fewer bugs, even if you have one of the best graphics cards already.
While the built-in Windows Update can search for the latest graphics card drivers, you’re much better off using Nvidia and AMD’s own management software. If it doesn’t come preloaded on your new PC, download and install GeForce Experience for Nvidia cards, Radeon Software for AMD cards or Game On Drivers for Intel Arc cards.
These applications will automatically check for updates on a frequent basis, but if you’ve just booted up a new computer for the first time, you’ll want to open them up and click the manual “Check for updates” button.
Adjust Display Scaling
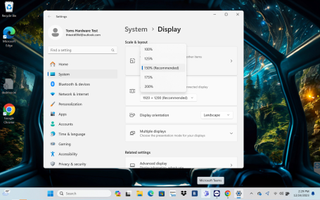
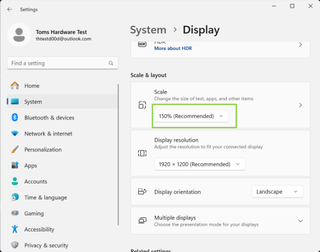
Out of the box, Windows decides how large to make the text, icons and other widgets. A lot of the time, particularly on laptops, the operating system decides to operate at 150 percent or larger scaling, which makes it easier to read fits less on the screen. Other times, the default scaling is too small as was the case with me and my 4K monitor, which felt most comfortable at 175 percent scaling.
To adjust the scaling to meet your personal preferences:
1. Navigate to Settings->System->Display
2. Scroll down to the “Scale and layout” header.
3. Try different percentages until you find the one that works best for you.
If you can see 100 percent scaling comfortably, that’s ideal, because it provides the most screen real estate.
Create Keyboard Shortcuts for Favorite Apps
Every time you roll your pointer across the screen, launch the Start menu and click an icon to launch one of your favorite apps, you’re wasting a little time. Create keyboard shortcuts for your favorite apps and you can launch them by hitting a single key combo such as CTRL + ALT + W to launch Microsoft word or CTRL + ALT + C for Chrome.
To create keyboard shortcuts:
1. Open the command prompt (you can get there by searching for “command”)
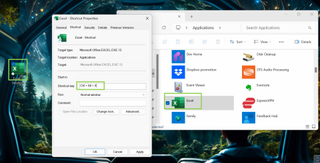
2. Enter “explorer shell:AppsFolder” (without the quotes). A window with icons for all of your installed apps opens.
3. Drag the app you want onto your desktop.
4. Right click the desktop shortcut icon and select properties.
5. Enter a key combo, usually one that includes ALT + CTRL + LETTER, into the “Shortcut key” box and click Ok.
Repeat for all your favorite apps.
Silence the Startup Sound
By default, Windows 11 makes a chime whenever it starts up. That can lead to an embarrassing situation if you boot up your computer in a place where you need to be discrete like a library or a classroom or even your own home when your family is asleep.
To silence Windows startup sound, first
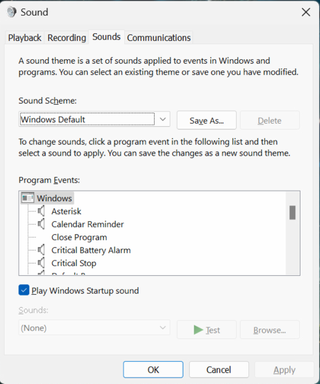
1. Search for “system sounds,” and click the top result.
2. Uncheck the box next to “Play Windows Startup sound” and click Ok.
If you’re setting up your new laptop up discretely while your family thinks you’re paying attention to their holiday chatter, you should turn off all sounds (or just mute the speaker) until the coast is clear.
Enable System Protection / Restore Points
If something, like a bad driver, prevents Windows from booting or causes frequent blue screens of death, one likely solution is to return Windows 11 to its previous state. The best way to take a step back to a previous configuration (with the old driver or update or settings) is to do a system restore, which is accessible from the Advanced Startup menu (hitting F11 on boot) if your computer won’t boot properly or from the Control panel if it will.
However, by default, System Protection, the feature which creates restore points you can return to, may be off. To turn on System Protection:
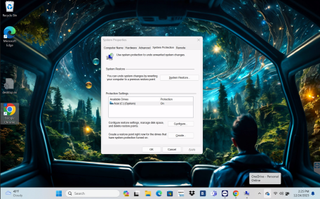
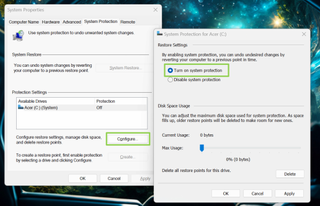
1. Type “restore point” into the search box and click the top result.
2. Select your boot drive (usually C drive)
3. Click the configure button
4. Toggle “Turn on system protection” to on.
We recommend setting maximum disk space usage to at least 5GB. Also you’ll want to click the “Create” button to set up your first restore point.
Change Your Default Browser
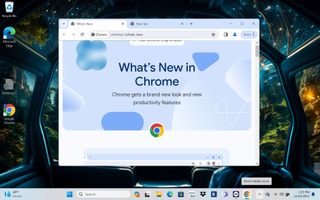
There’s a reason why Microsoft Edge has only 11 percent of the desktop browser market. It’s not a bad browser, but many people prefer the rich ecosystem of extensions and broad support that Chrome enjoys or perhaps they like Firefox or Opera better. If Microsoft Edge opens the site every time you click a link in your email software or instant messaging app, you need to change the default browser.
To change your default browser:
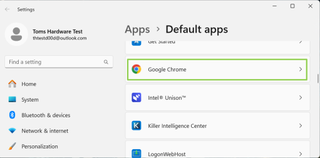
1. Search for “default apps” in the Windows search box and click the top result.
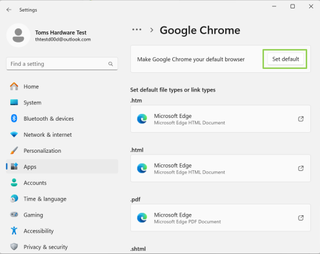
2. Double click on the icon for your preferred browser (ex: “Google Chrome”).
3. Click the “Set default” button.
You’ll then get your favorite browser when you click on links in email and your chat clients. However, if you click a link in the widget board or the Windows Search box, it will still open in Edge.

